An off-the-shelf facial implant is made for an average face. Yours is not average. A patient-specific implant (also called a custom or CT-planned implant) is designed from a scan of your own skeleton, so its underside is a negative cast of your bone and its outer surface is the shape you and your surgeon agreed on.
This article is about the part patients rarely get to see: how that implant is actually designed, checked and made, before it ever reaches an operating room. The images below are real planning renders from Op. Dr. Mehmet Cömert's practice.
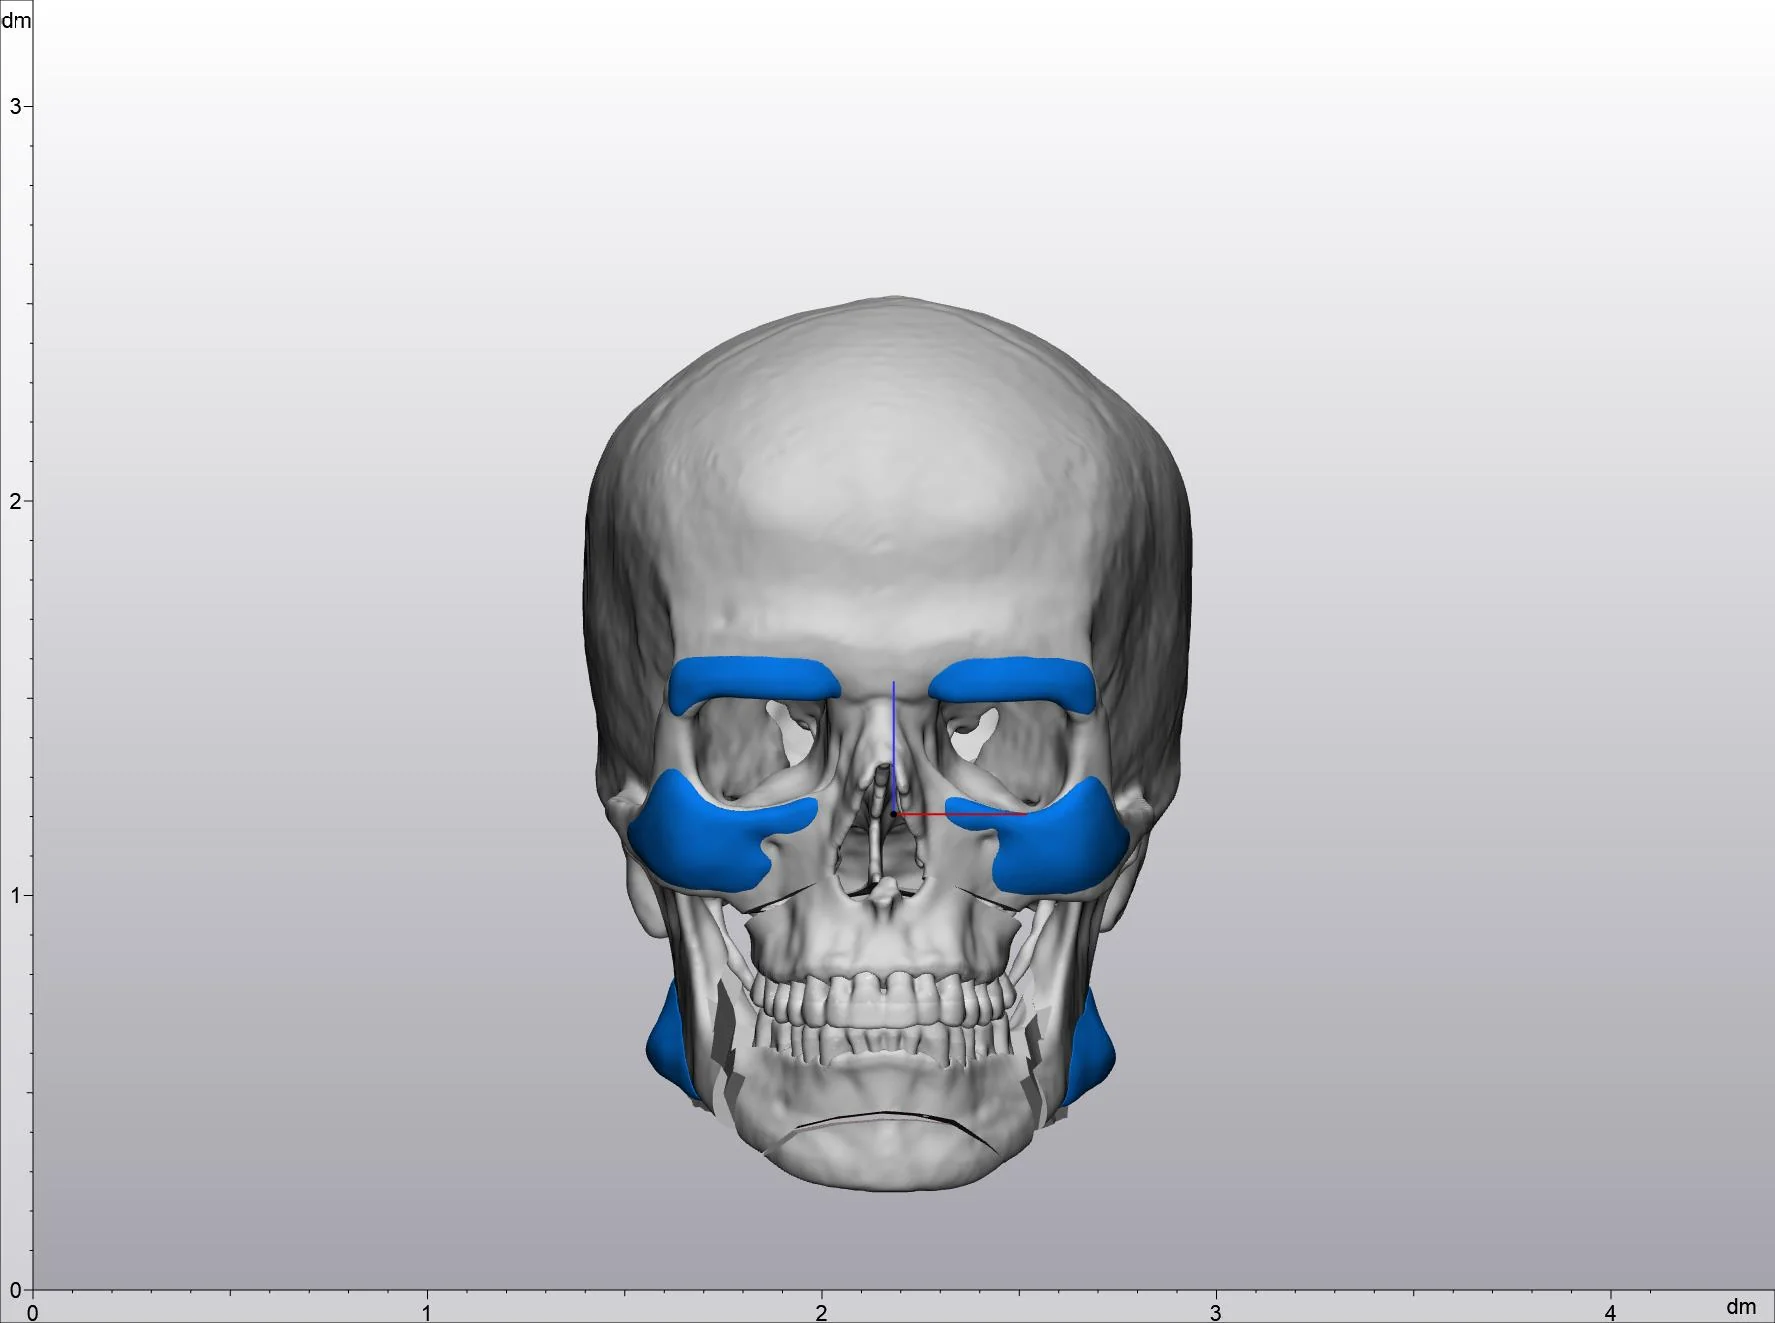
One plan, four regions. The blue shapes are patient-specific implants designed on this person's own skeleton: brow ridge (supraorbital), cheek and midface, and both jaw angles.
Key takeaways
- A patient-specific implant is designed on a 3D model built from your own CT scan, so it sits on your bone without rocking, gapping or needing to be bent during surgery.
- The design is not only about adding volume. Edges, thickness transitions and how the implant fades into surrounding bone are what decide whether the result reads as skeleton or as an object.
- Thickness maps let the surgeon see exactly how many millimetres are being added at every point, and adjust before manufacturing rather than in theatre.
- Custom is not automatically better for every case. Standard implants remain a reasonable choice for straightforward, symmetric augmentation.
- The scan quality sets the ceiling for the whole process. A poor CT means a poor model, and no amount of design work recovers it.
What "patient-specific" actually means
The term gets used loosely. It is worth being precise, because two very different products are sold under similar language.
Off-the-shelf (standard) implants
These come in a catalogue of sizes and shapes, usually in medical-grade solid silicone or porous polyethylene. The surgeon selects the closest match and, where needed, trims or bends it during the operation. They are well proven, immediately available and less expensive. Their limitation is that the fit is approximate: the implant meets your bone at whatever contour the manufacturer chose, and any gap has to be tolerated or filled.
Patient-specific (custom, CT-planned) implants
These are designed for one person and manufactured once. The underside is generated directly from your bone surface, so the contact is continuous. The outer surface is drawn deliberately: how far it projects, where it tapers, how it crosses a suture line or an existing asymmetry. Because the shape is fixed before surgery, the operation becomes placement rather than sculpting.
Why the difference shows up on bone, not on paper
Facial bone is rarely symmetric. Most people have one cheek slightly fuller, one jaw angle slightly lower, one brow slightly heavier. A standard implant placed on both sides of an asymmetric face tends to preserve the asymmetry, or worse, exaggerate it. A patient-specific pair can be drawn with deliberately different volumes left and right, so that the finished skeleton is more balanced than the one you started with.
How your implant is designed, step by step
Step 1: the CT scan
Everything begins with a computed tomography scan of the facial skeleton. What matters is slice thickness: thin slices produce a smooth, faithful bone surface, while thick slices produce a stepped one that has to be smoothed, and smoothing is guesswork. A cone-beam CT is often sufficient and involves a lower dose than a conventional medical CT. Your surgeon will tell you which protocol they need; bringing the raw DICOM data rather than printed images matters, because the design is done on the volume, not on pictures of it.
Step 2: turning the scan into a skeleton
The scan is segmented: bone is separated from soft tissue and reconstructed as a three-dimensional surface model. This is the model you will see in your plan, and it is your own anatomy, not a generic template.
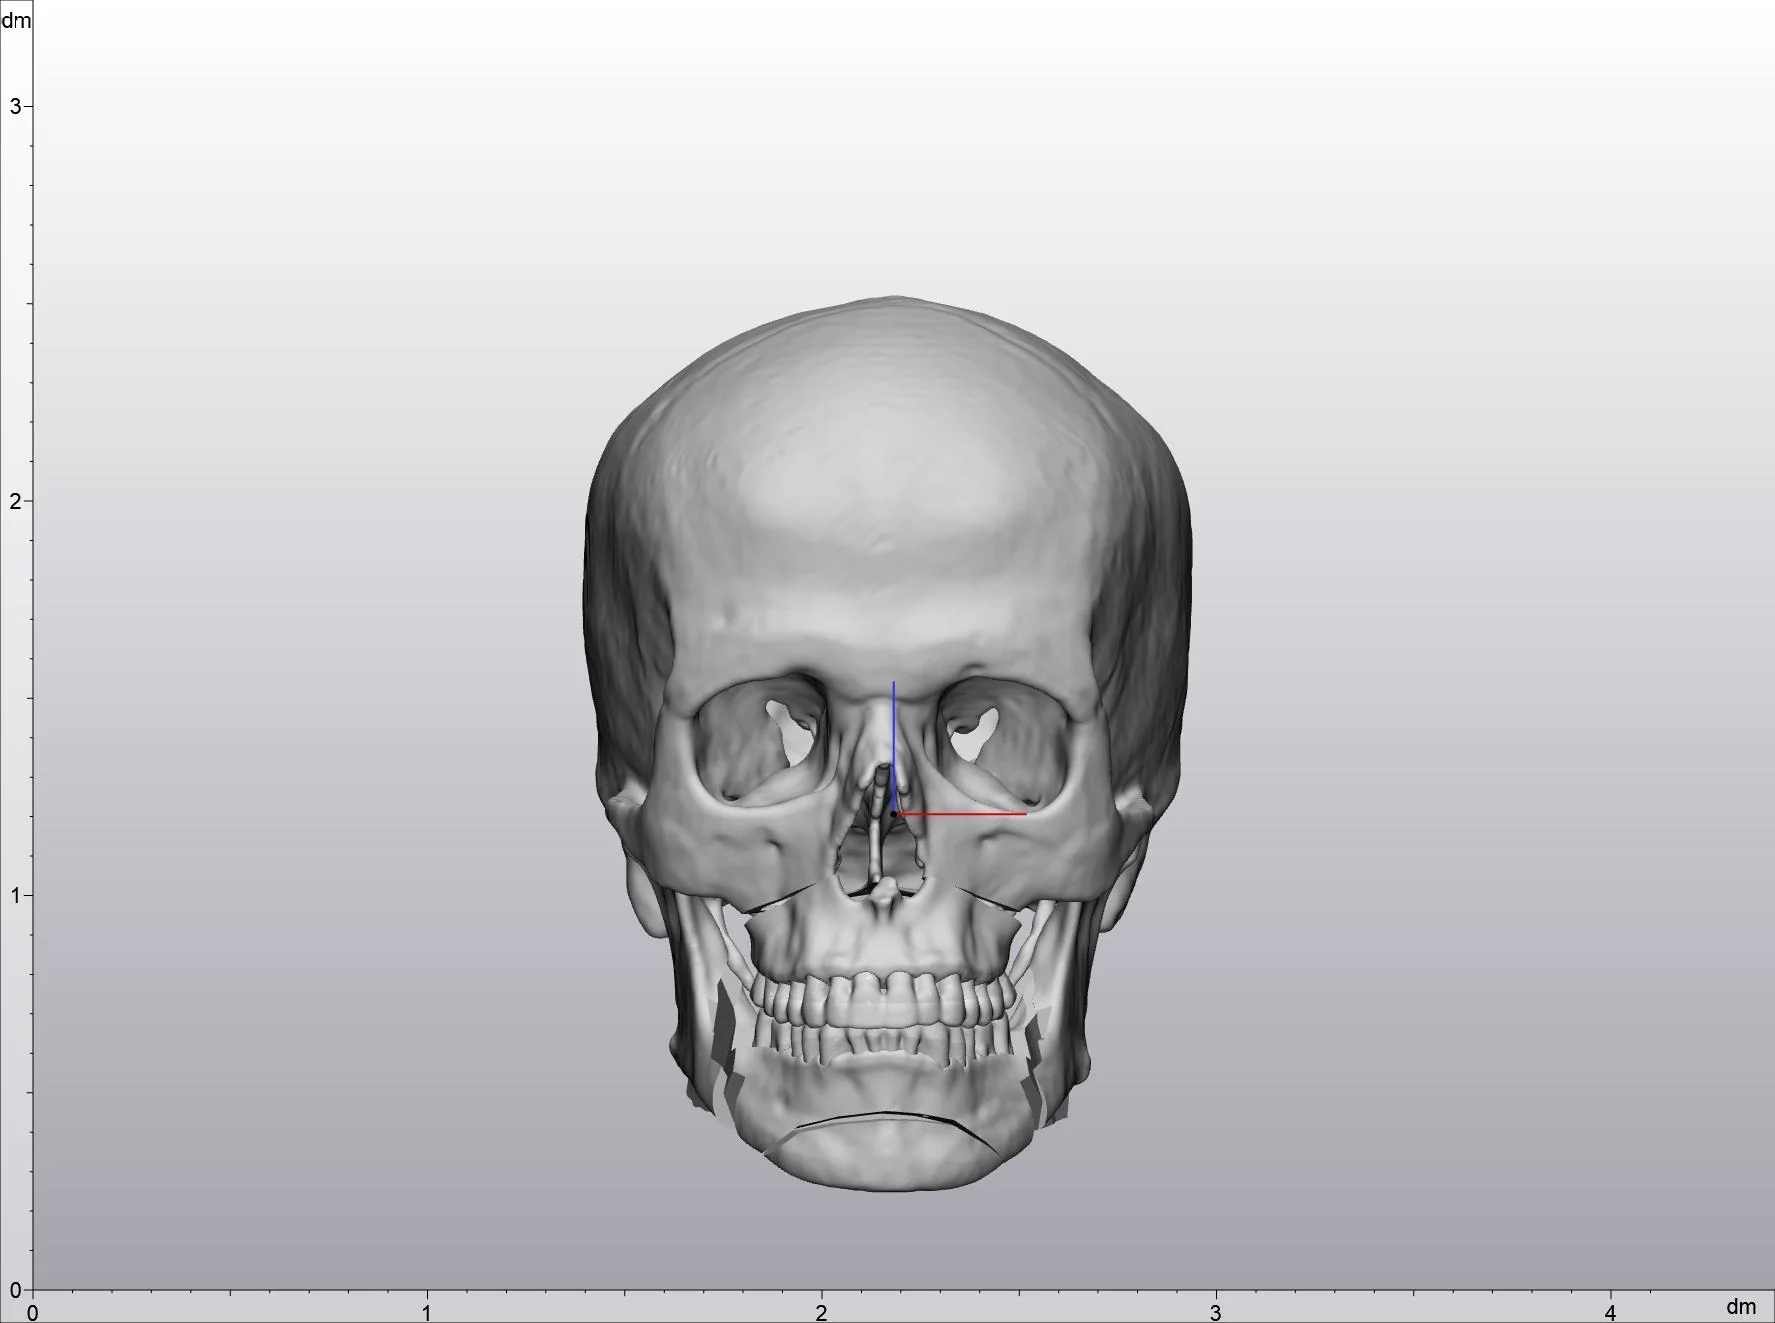
The starting point: your skeleton reconstructed from the CT volume, before anything is added. Every later decision is measured against this.
Step 3: designing on your own bone
The implant is then drawn directly onto the model. The surgeon decides projection, width and how far the shape extends, while the software keeps the underside locked to the bone surface underneath. This is where the aesthetic conversation happens, and where a plan can be revised as many times as needed at no cost to the patient.
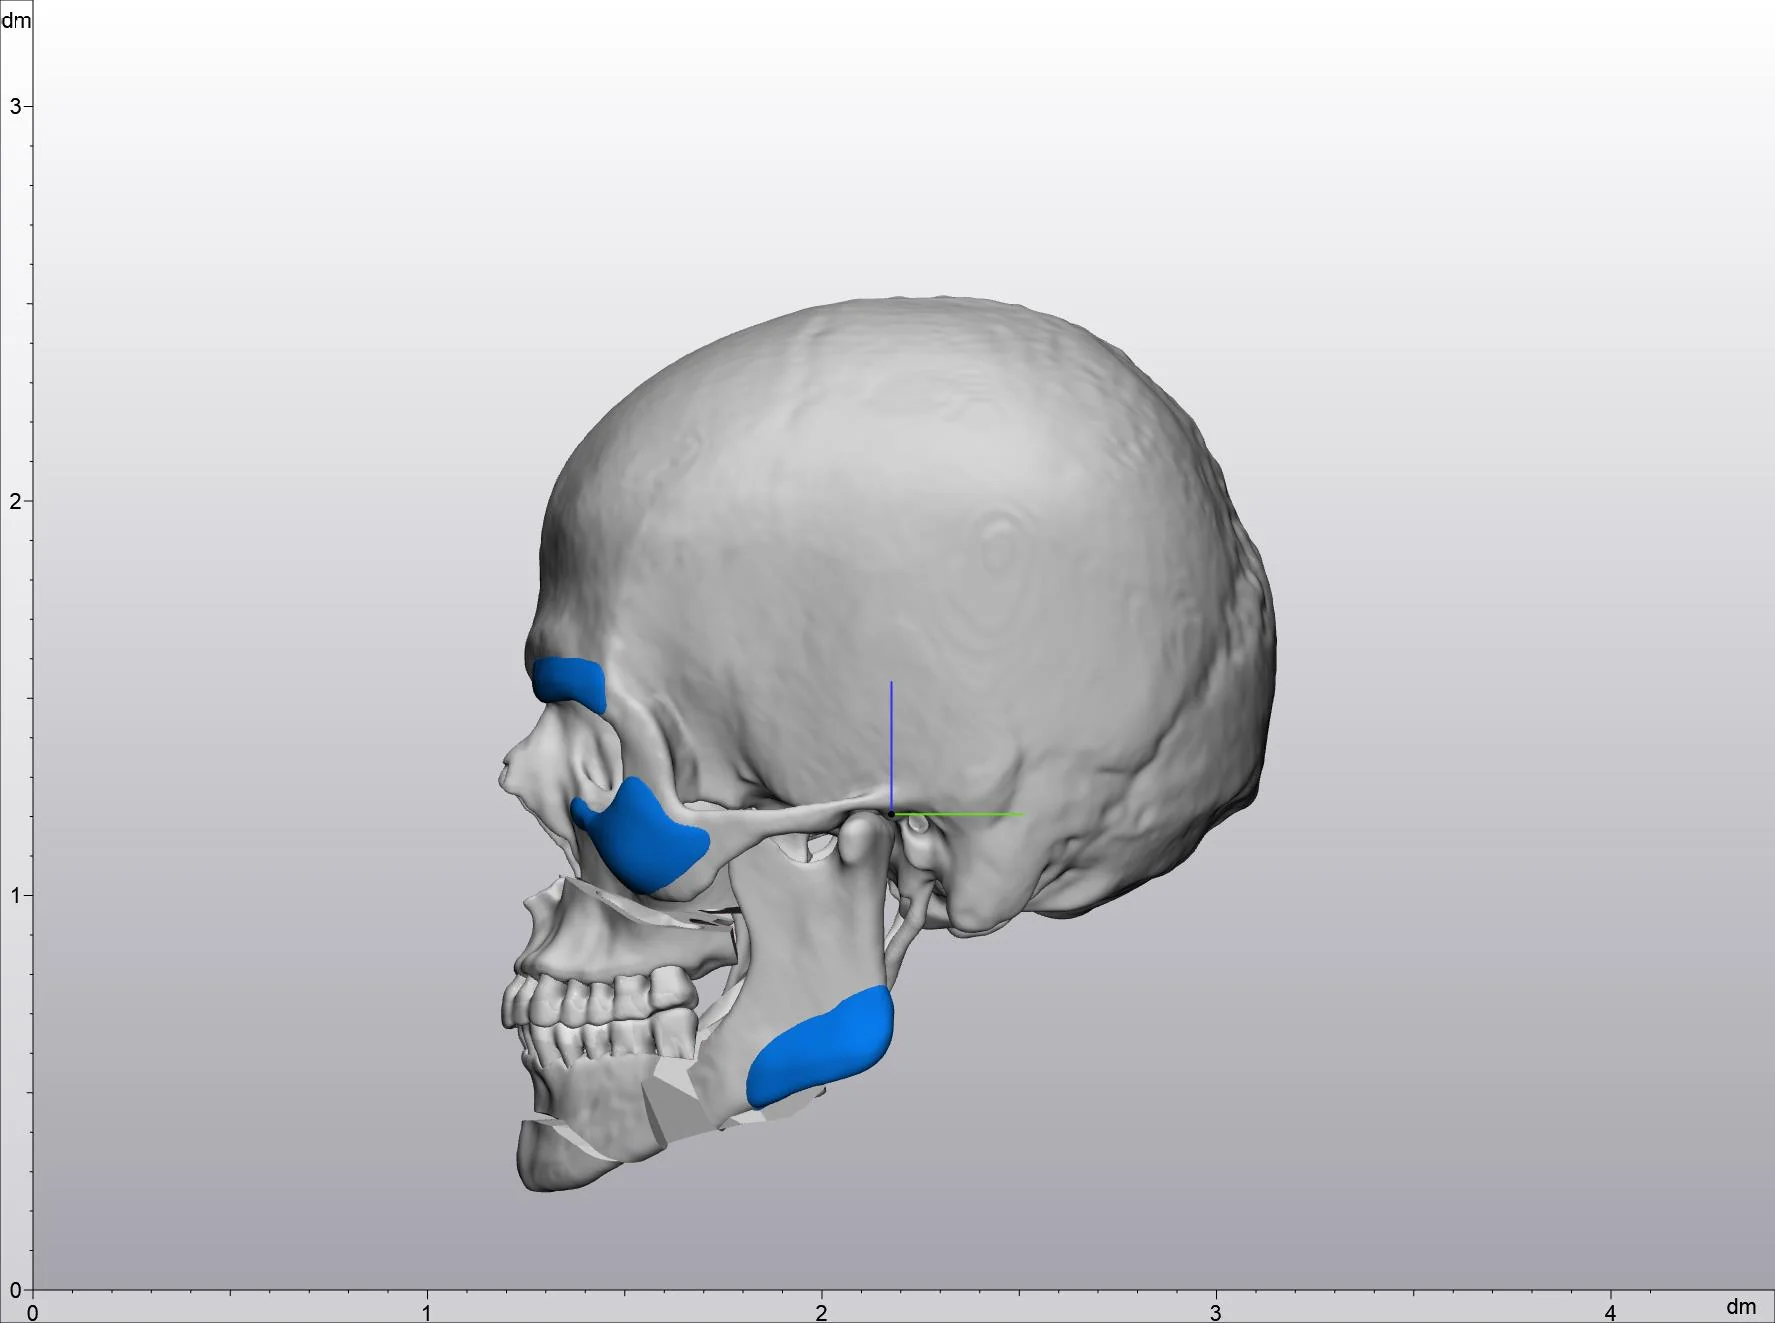
The same plan from an oblique angle. Seeing the design in three-quarter view matters, because this is closer to how a face is actually seen than a straight-on view.
Step 4: checking thickness and edges
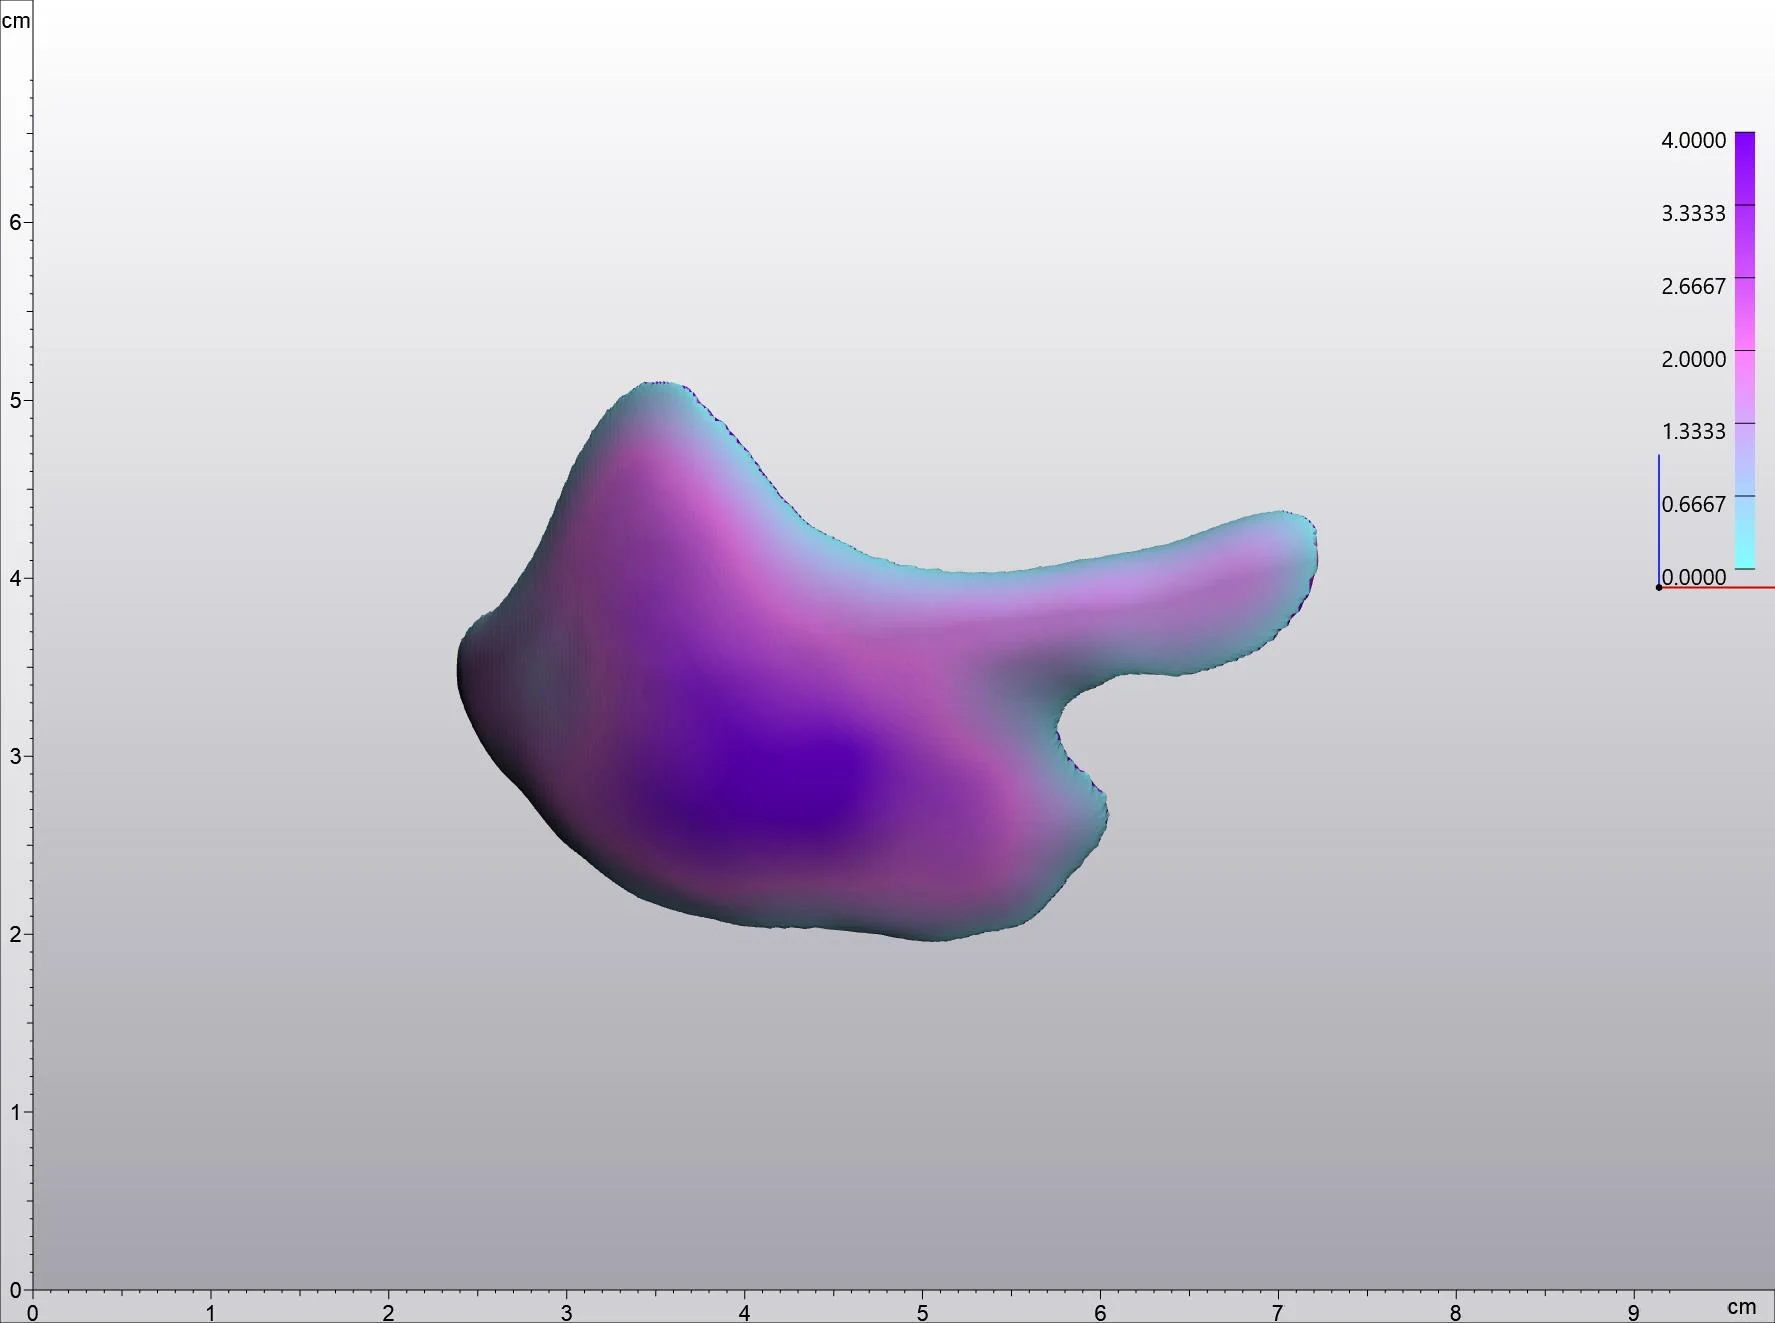
A shape that looks correct in silhouette can still be wrong in cross-section. Thickness maps colour the implant by how many millimetres it adds at each point, which turns an aesthetic judgement into a measurable one. They also expose the part patients never think about: the edge. An implant that ends abruptly can be felt through the skin and sometimes seen. One that tapers to nothing over a sufficient distance disappears into the skeleton.
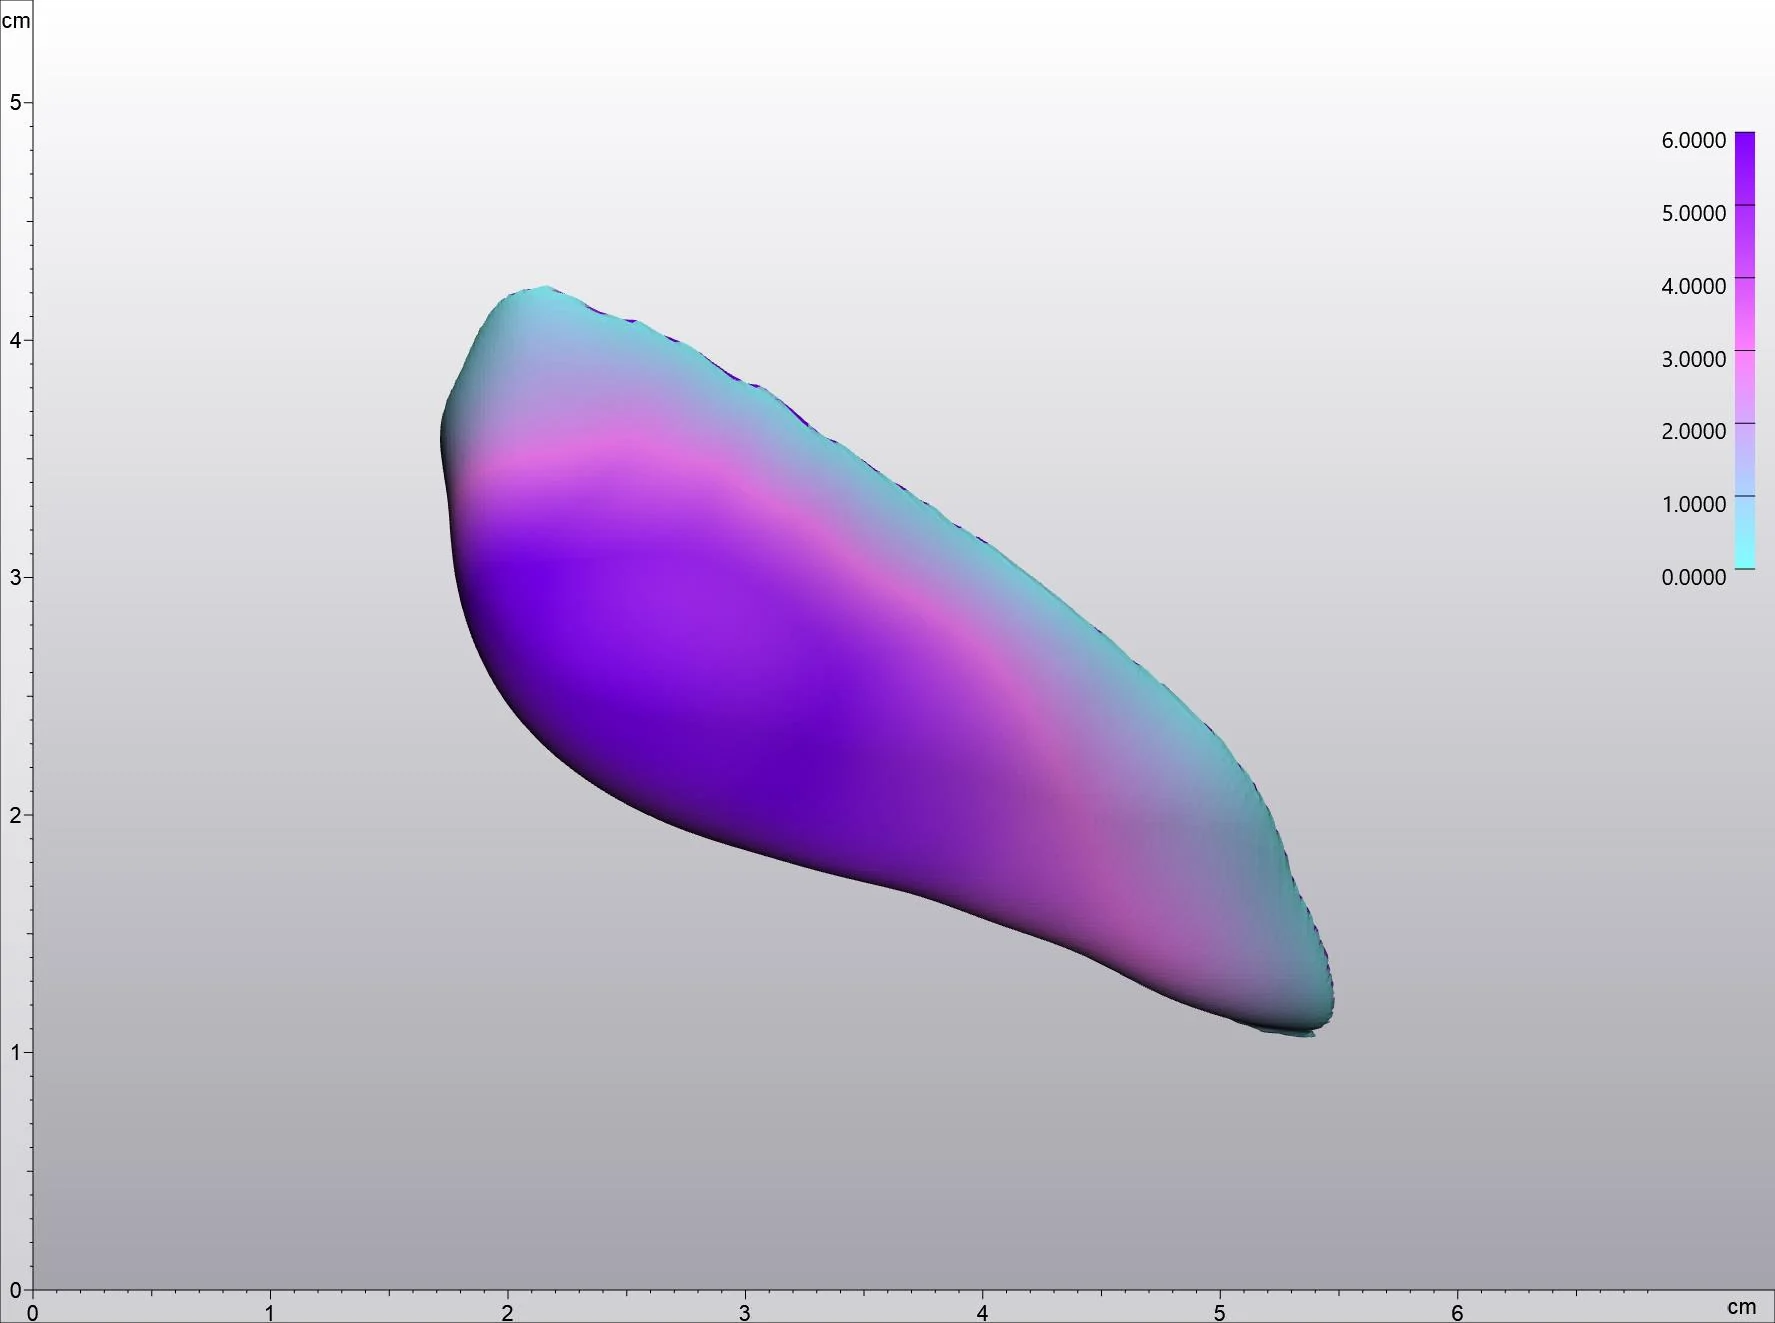
A jaw angle implant coloured by thickness. The deepest colour marks maximum projection; the pale margin is where the implant thins out and blends into the mandible.
The same check on a cheek implant. Midface implants sit under thin, mobile soft tissue, so edge transitions matter even more here than at the jaw.
Step 5: manufacturing
Once the design is approved it is manufactured, typically by milling or 3D printing. Material choice depends on the region and on surgeon preference:
- PEEK (polyether ether ketone): rigid, biologically inert, radiolucent, widely used for larger skeletal implants.
- Titanium: very strong and well tolerated, but radio-opaque, which can obscure later imaging in that area.
- Medical-grade solid silicone: softer, removable, long-established for chin and jaw augmentation.
- Porous polyethylene: allows tissue ingrowth, which resists movement but makes later removal harder.
There is no single best material. The honest framing is a trade-off between rigidity, imaging, and how straightforward revision would be if it were ever needed.
Step 6: placement
Because the implant only fits one way on one skeleton, positioning becomes far less subjective than with a trimmed standard implant. Where the plan calls for it, patient-specific guides can be produced alongside the implant to mark screw positions. Fixation with small screws prevents the migration that is one of the recognised long-term problems with unfixed implants.
Region by region
Jaw angle and the gonial region
Jaw angle implants widen and define the lower face and sharpen the angle between jaw and neck. This is the region where custom design earns its keep most clearly, because the mandible is highly individual and a standard implant frequently rocks on it.
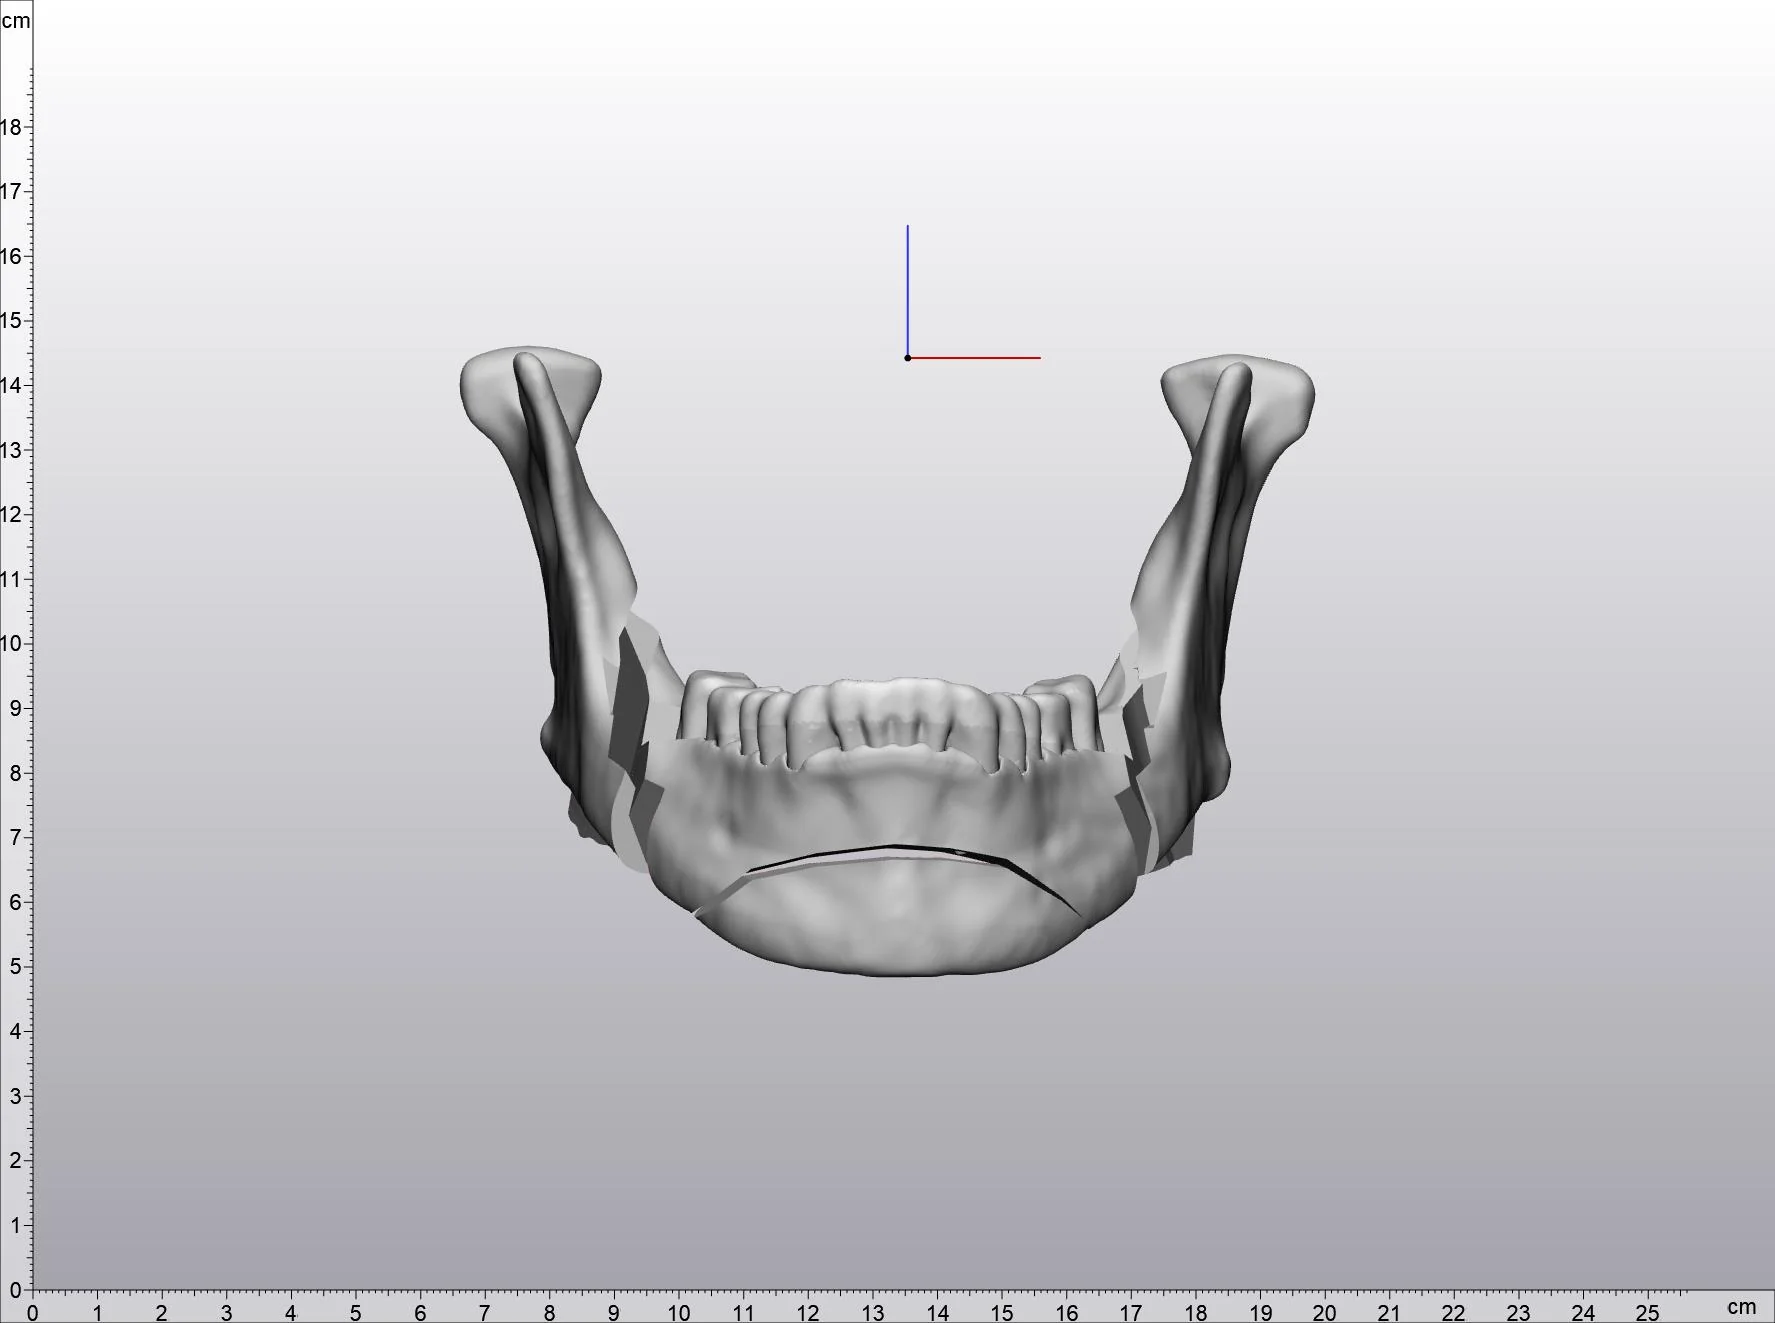
The mandible from above, as it is.
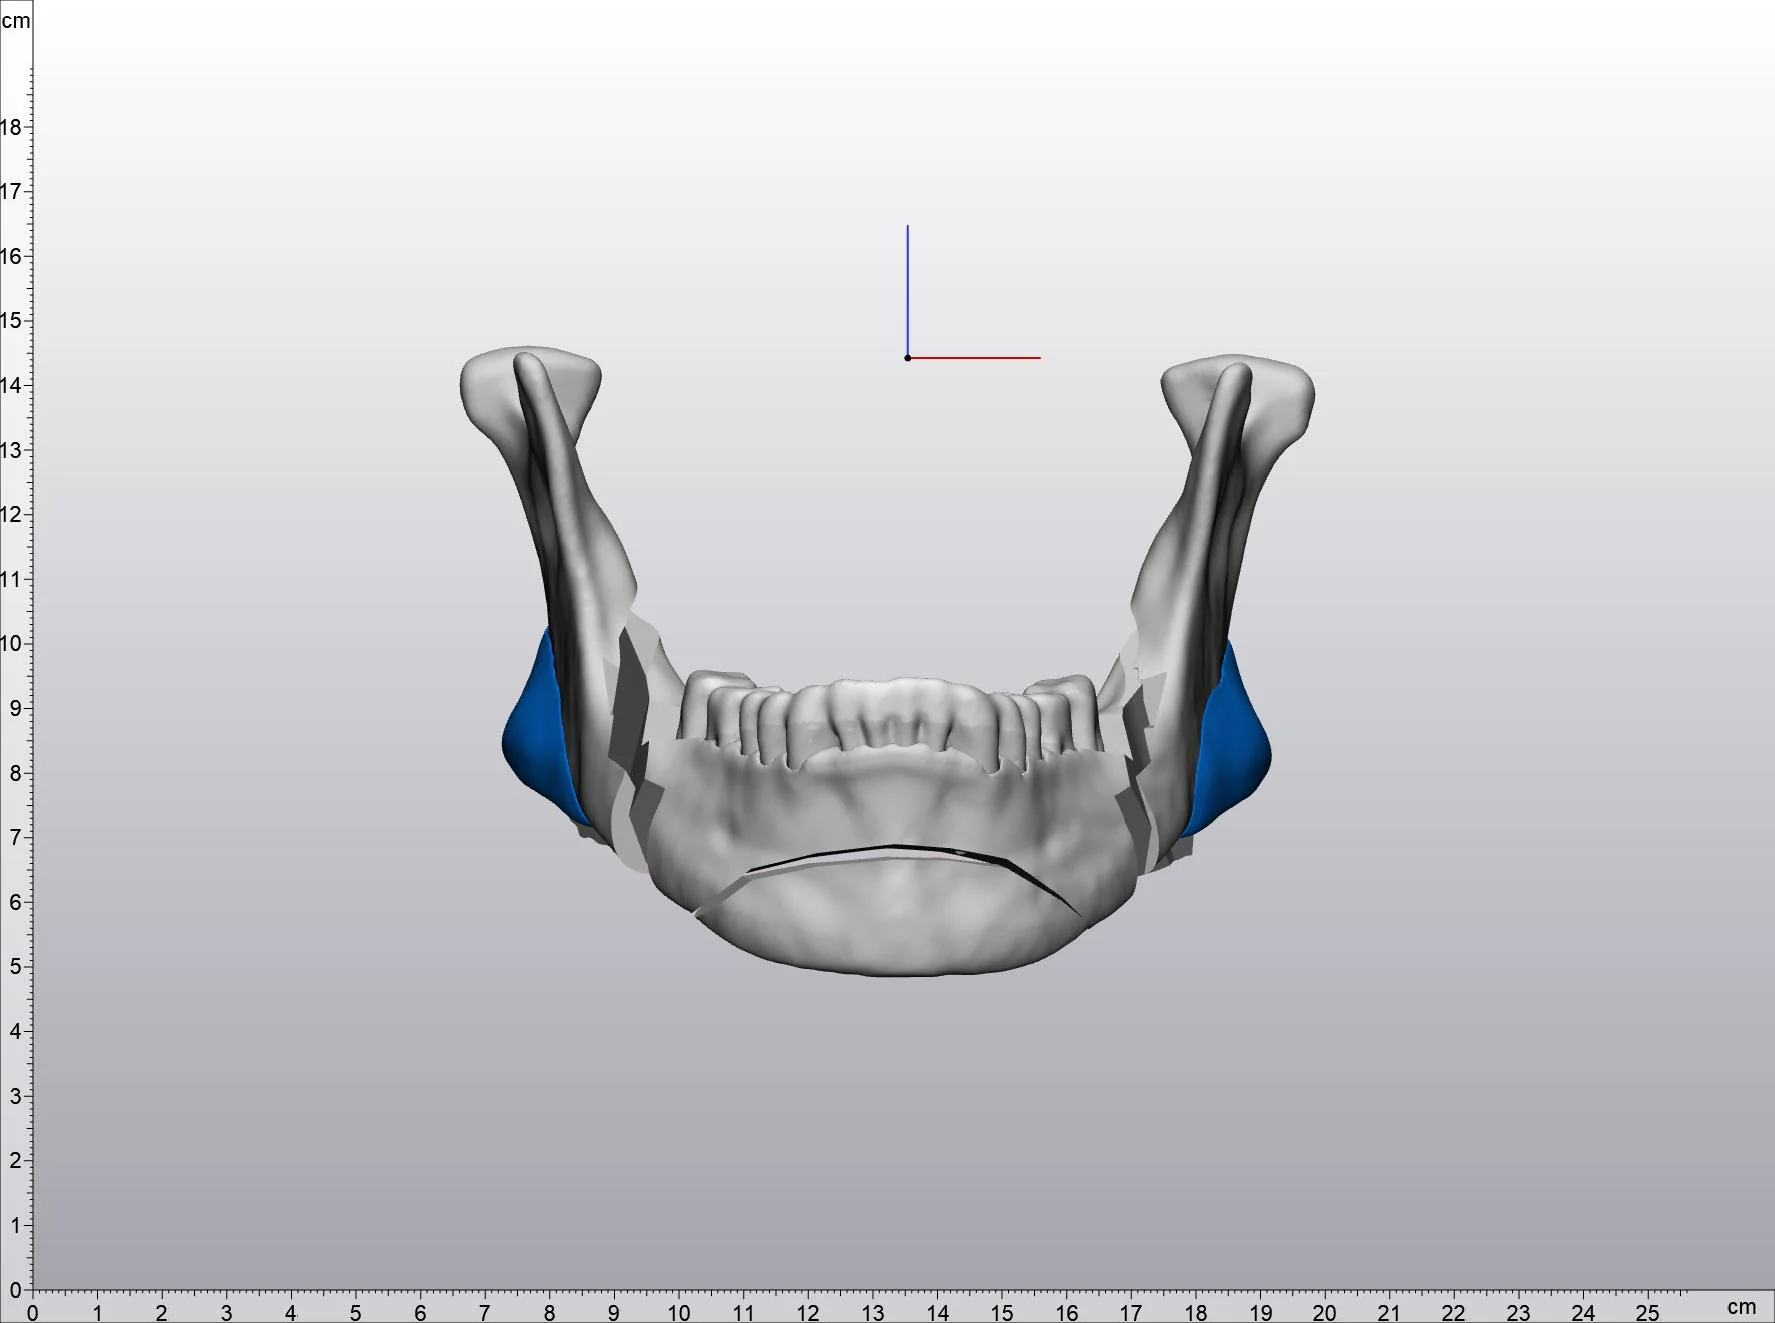
The same view with planned implants in place. Seen from above, the change in lower-face width is easier to judge than from the front.
Brow ridge and supraorbital rim
Our guide to supraorbital implants shows the real dimensions of these designs and how the operation works.
The brow ridge is one of the strongest markers of facial character, and one of the least well served by standard implants, which are not generally made for this region. Supraorbital augmentation adds projection across the brow, usually blending laterally toward the temporal line. Because the skin here is thin and mobile, the design has to taper carefully at the upper border, and the plan must respect the frontal sinus underneath.
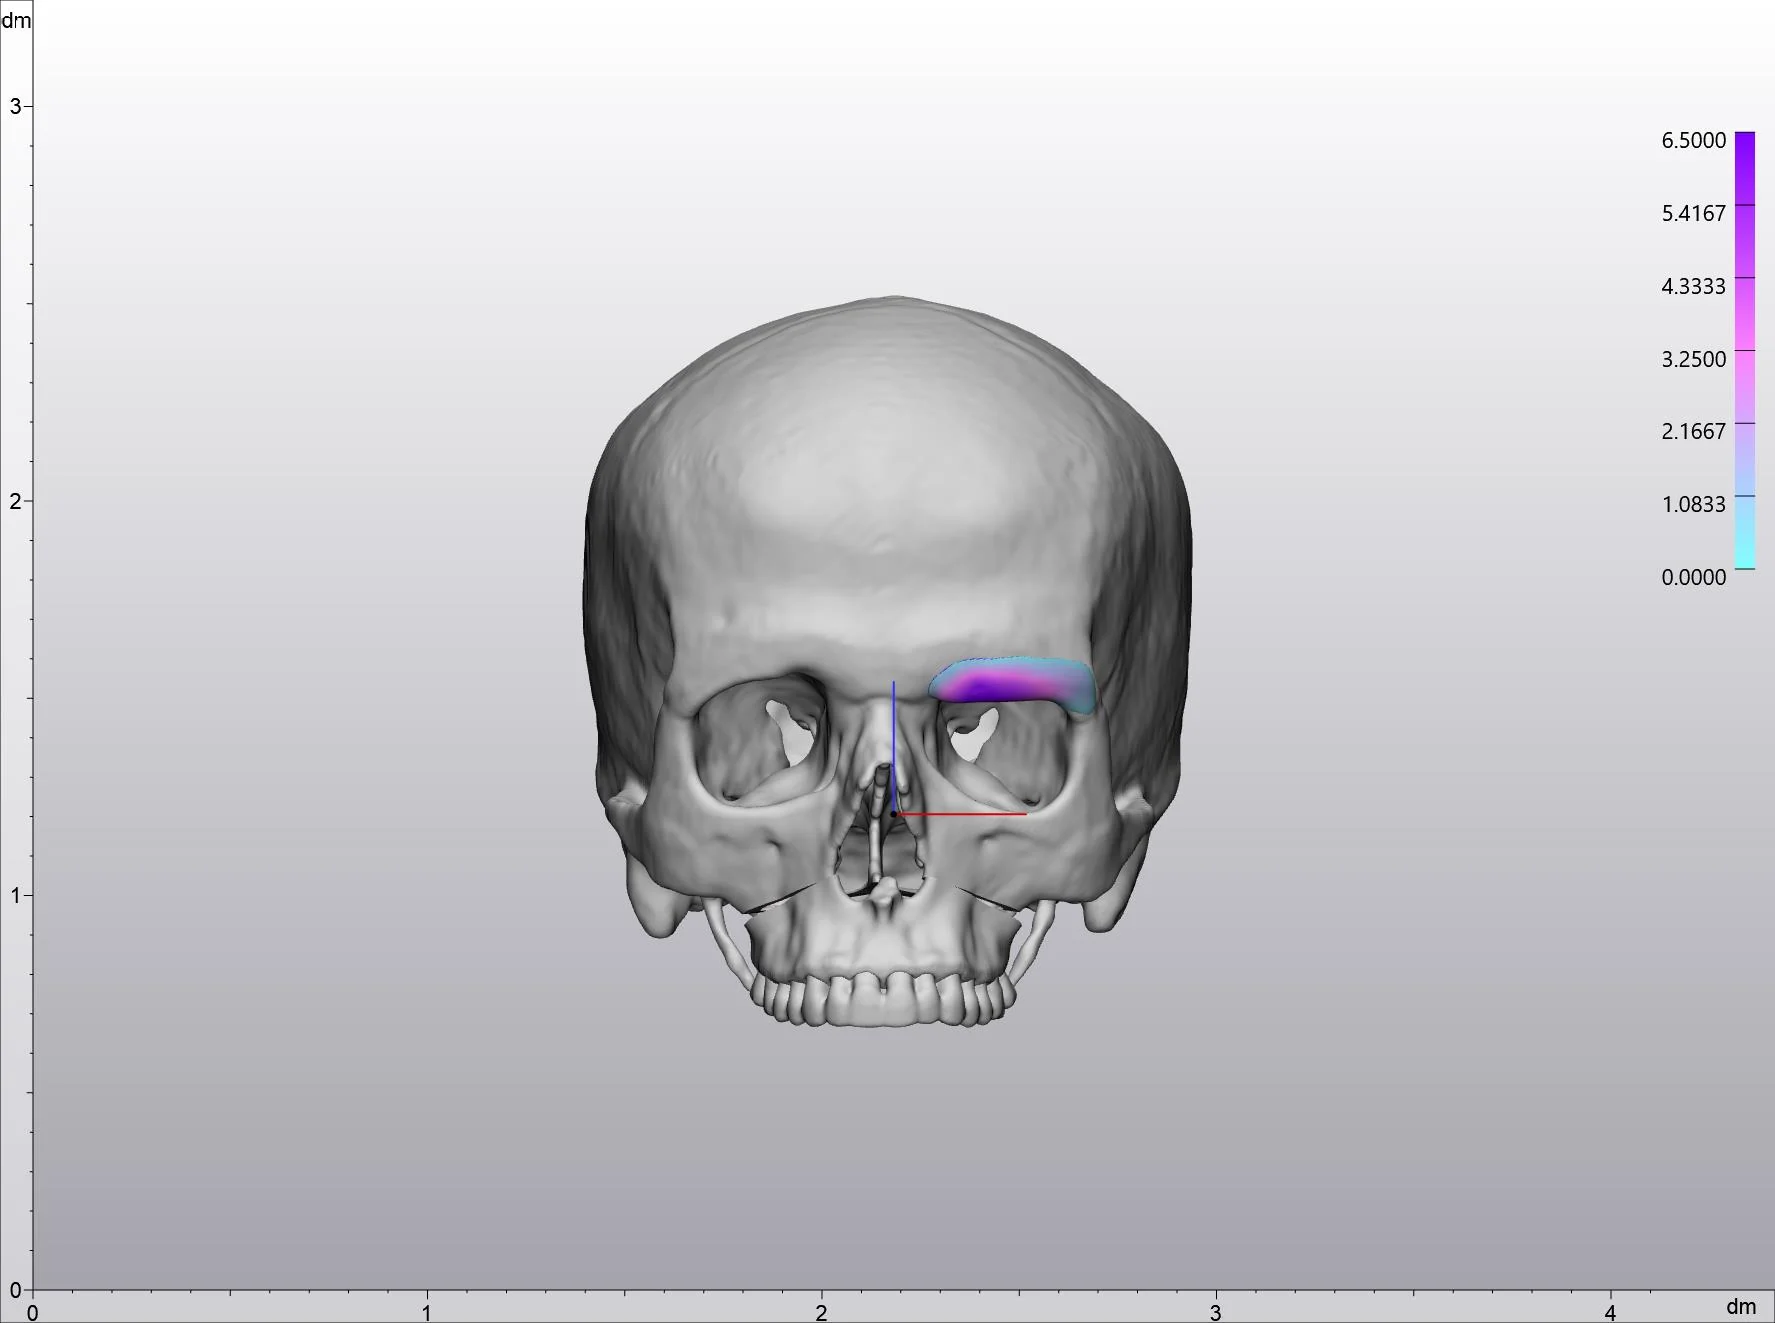
An implant planned around the orbital rim. In this region millimetres are decisive, and the shape has to follow the curve of the socket rather than sit across it.
Cheek and midface
Cheek implants restore or add midface projection. The common error is treating them as volume alone: where the volume sits matters more than how much of it there is. A shape placed too medially reads as puffiness, while the same volume placed higher and more laterally reads as structure.
Chin
The chin can be addressed with an implant or by moving the bone itself (a sliding genioplasty). Implants are simpler and reversible; genioplasty can change chin height and correct asymmetry in ways an implant cannot. Which is appropriate depends on what needs to change, and it is worth reading about jaw and chin surgery before assuming an implant is the answer.
How to read a planning render
If your surgeon sends you a plan, a few things are worth looking at deliberately rather than glancing at the overall shape:
- Look at the edges, not the middle. The centre of an implant is rarely the problem. Ask where each implant ends and how gradually it gets there.
- Ask for an oblique view. Faces are seen from three-quarters far more often than straight on, and a plan that looks balanced from the front can look heavy from the side.
- Compare left and right deliberately. If your face is asymmetric and the two implants are identical, ask why.
- Ask what the maximum thickness is in millimetres. A number is easier to reason about than a colour.
- Remember that bone is not the face. Soft tissue sits on top and softens everything. The render is the framework, not the finished result.
Patient-specific or standard: choosing honestly
Custom is not automatically the right answer. A standard implant is reasonable when the augmentation is modest and symmetric, when the region is one where catalogue shapes fit well, and when cost or timeline are decisive. Patient-specific design is worth it when the skeleton is markedly asymmetric, when several regions are being changed together and must agree with each other, when a previous implant has failed to fit, or when the region is one where standard shapes barely exist, such as the brow ridge.
There is also a practical difference: a patient-specific implant takes time. The scan, the design cycle and manufacturing add weeks between decision and surgery. If you are travelling for treatment, that sequencing needs planning.
Limits and honest expectations
A well-designed implant that fits perfectly still cannot do everything.
- It changes the skeleton, not the skin. Loose or ageing soft tissue is not corrected by adding bone volume underneath, and can occasionally be made more obvious.
- Infection remains the main implant-specific complication. It is uncommon, but when it occurs it can require removal.
- Sensation can change. Nerves run close to several of these regions, and temporary altered sensation is not unusual.
- The plan is a plan. Anatomy found in surgery occasionally differs from what the scan suggested.
- Revision is possible but not trivial. Materials that encourage tissue ingrowth are more stable and harder to remove; this trade-off should be discussed before, not after.
What to bring to a consultation
If you are considering patient-specific implants, three things make the first conversation far more productive: your CT data as raw DICOM files rather than printouts, photographs in consistent lighting from the front, three-quarter and profile, and a clear description of what specifically bothers you. "My jaw is not defined" and "my face is asymmetric" lead to very different plans.
Dr. Cömert reviews scans and photographs personally before any design work begins. You can send them through the online assessment, and read more about the procedure itself on the custom facial implants page.